Come join me at terrain in Westport, CT tomorrow to celebrate this harvest season! There will be lots of treats, workshops, crafts, music and more. You can make your own birdhouse/birdfeeder, vote on the best home-baked pie, learn how to make a pumpkin centerpiece or harvest wreath. Some workshops require pre-registration, so please check the terrain website first. The Westport Farmer's Market will also be there with an abundant market of fresh veggies...so bring your appetite too. Several artists (including me!) will also be there with an assortment of wares from ceramics and scarves to photographs and jewelry. I'll be offering framed and unframed original hand-carved woodblock prints.
Thank you to everyone (again and again) for your fantastic suggestions on picking the binding fabric for my quilt! Once i finish it off, i'll be sure to show you how it all turned out. So for Part One of the giveaway, and our random winner of the Terrain fat-eighth bundle...
Hooray to you! We sent out your bundle yesterday and it's already on its way to your front door!
Onto Part Two of our giveaway...
Sunday was a big day here in Fairfield...and i mean BIG! Giant pumpkins were trucked in from all over Connecticut and neighboring Rhode Island for the annual CT Giant Squash and Pumpkin Grower's Association weigh-off. That's the CTGSPGA for short. You've heard of it, right? Me neither. And like me, did you also not know that there's an International Great Pumpkin Commonwealth (GPC)? Yep, we've been missing out! The growers and farmers we met on Sunday were such an enthusiastic bunch and i could have talked pumpkin with them all day long. As it was, Pete and i learned many interesting facts about these...fruits!
Some of you were wondering how the pumpkins are transported. As far as we could understand, they're lifted from their patch using a pulley system and harnesses that are specially configured around a big metal ring to ensure the weight is as evenly distributed as possible. Here's a picture i found that matched the description one of the farmers had given to me:
Then they're lowered into the back of a truck and onto a wooden palette that's been covered with a soft, cushie material like foam insulation panels or blankets. This one is being unloaded here in Fairfield, but you get the idea:
dropping off
All i could think of is what these must have looked like driving down the interstate in the back of a pick up truck!! Over the course of the morning, more pumpkins continued to appear — including Dr. Garrell's — the one you were asked to guess the weight of. Hooray! Well, until the one to the right of his showed up.
We had a chance to talk with Dr. Garrell and found out that he lost his entire patch during hurricane Irene...except this one pumpkin that he found floating in the flood waters. He explained how heartbroken he was after hand-pollinating the pumpkins and nurturing them through what was unanimously a very challenging growing season. Apparently his dreams of record-making-victory were dashed when his contender stopped growing over a month ago. I asked how he knew that it stopped growing? The answer blew me away. He told me that once a pumpkin of the giant variety reaches beach ball size, it will grow somewhere between 30 and 50 pounds a day, A DAY!! Is that crazy or what?! And they do much of their growing at night. Here's a cool time-lapse clip that shows a giant pumpkin growing from 40 to 225 pounds. The photos were taken every 4 hours and only during daylight hours, but it still gives you a sense of the rate at which these things grow:
Back to our escalating competition...after a pumpkin was dropped off, a swat team of contest officials would swoop in and take measurements...
measuring at widest point
...and then they'd go around to each one and perform a "tap test" which would help them determine what kind of density the walls of the pumpkin has. The variety of sounds each one made was remarkable (i tagged along). Some were more hollow, some more thunkie, some more...i don't know...clunkie? As you can tell, my pumpkin vocabulary is limited.
Tap test
Don't they look like someone let the air out?
The pumpkins were then lifted (again with that metal ring and harnesses) and placed on a flat scale — sorry no pictures...camera battery was on-the-blink! But i managed to save just enough battery juice for one last photo of the BIG results:
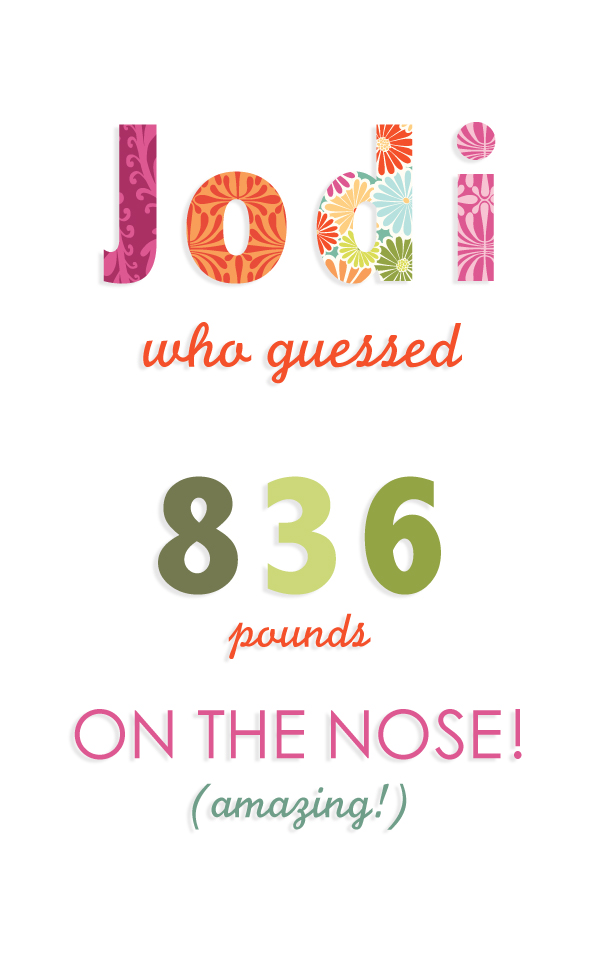
Wow! As you can see, Dr. Garrell's pumpkin came in 6th place and weighed a whopping 836 pounds! Sooo...aren't you dying to know who guessed closest?! We were too! Won't you please join me in congratulating
We were so surprised that anyone guessed it exactly, but Jodi hit it smack on the bullseye! Way to go, Jodi! Your jelly roll was sent off yesterday so be on the lookout for it any day now.
Several of you were only off by a pound or two — impressive! And so all 15 of our additional winners guessed within a mere 10 pounds of the correct weight (without going over). If your name appears below, congratulations! Please send your mailing address to pete@katespain.com and we'll send your mini charm pack of Terrain off right away!
Thank you all so much for playing along!! GPC weigh-offs are happening all over the country around this time of year, and if you're curious (like me) you can check the standings here. However, the world-record (not listed, but shown here) was broken this year by a pumpkin weighing-in at 1810.5 pounds. That's a lotta pie!
I wanted to leave you with these two pictures because it is beginning to look (and feel) a lot like Halloween around here...
our resident Charlotte (or Charlie?) just outside our garage
Don't you just love the Fat Quarter Shop? I do — and not just because they happen to carry a lovely assortment of my fabric *wink* (though i love them for that too) but because they know how to make things fun! They've recently started a Q&A series on their blog, the Jolly Jabber, called Designer Tidbits. It's such a lively and personal way to introduce you to new and upcoming fabric lines...straight from the designer! If you want to find out about what inspired a collection, or get a sneak peek at upcoming lines, or learn some silly facts about favorite snack foods or what's in the fridge, then you definitely need to check it out. Plus, they do lots and lots of awesome and generous giveaways :)
They've also started another series called Designer Select, and i was thrilled when they asked me to participate. Basically, each designer is asked to select an assortment of 12 prints and 3 solids of their current fabric collection. For me, that would be Terrain. It was a challenge to narrow it down to just 12 skus! But i had so much fun playing around with grouping different color combinations, and finally settled on a cool palette with some of my favorite prints and colors in the collection:
When i saw the beautiful Bella solids that Moda made to match the deep iris-blue-purple and moss green in Terrain, i knew i wanted to coordinate with those since they would give me the chance to highlight the periwinkle, navy and teal range. For some reason, i'm naturally drawn to cool colors — with the exception of orange, that to me is in a whole category of its own. I hope you love this assortment as much as i do and that it gets your creative
wheels spinning!
Oh yeah, i mentioned a giveaway, didn't i? Another part of the Designer Select series is that the Fat Quarter Shop is giving away one of these bundles to a lucky winner! In addition to giving some background on inspiration, i was asked to give three facts about myself...two true facts and one fib. All you have to do is pick which one is the fib and you could win! So click on over to enter your guess while there's still time. The giveaway ends on Monday Sept. 26th.
It should be landing on the shelves soon...maybe even at your LQS! You can also find it here (available now) along with some great patterns by Jaybird Quilts, Sweet Jane's Quilting and Design, and the Schnibble Queen...Miss Rosie's Quilt Co.. If you'd like, you can download the free pattern i designed as the project sheet to go with the collection. It's a quilt called "Stepping Stones" and i was floored when it popped up in the Terrain flickr group! Suzanne made it even better by making it bigger and adding that cute border.
Have fun exploring the bright saturated colors of Terrain, and please don't forget to share here so we can all see what you've created!
It's nearing the beginning of September which means that Terrain will be shipping soon! Woohoo! This is just a quick post to let you know that if you'd like to learn a little about the inspiration for this collection, i'm guest blogging over at Quilting Arts! I was so happy when Lindsey invited me back and want to thank QA for hosting me. Annnd Lindsey has upped the ante of excitement by adding a Terrain giveaway to the post!
I also got an email this morning from Melanie, who won the GO!baby giveaway. You will all be happy she won when you read her blog post about it. You see, Melanie was so thankful for her good fortune that she would like to pass some of it on to you in the form of...that's right...a Terrain giveaway! It's Melanie's first ever giveaway, so please head over and show her some love!
I suppose you could also discover modern the traditional way. Or discover modern the modern way. Or...well, you get it. But what am i talking about anyway? In this case, it's a beginner quilter (me) exploring the inherent possibilities of the half square triangle. This will make sense by the time you finish reading, i promise.
If you read my blog (thank you), you know how i feel about sewing triangles. I mean there's a bias edge on these things! That alone sends chills down my spine. But fears can be overcome by facing them head-on and that's just what i did when the fabulous people at AccuQuilt asked if i would like to try out their GO!baby fabric cutter. Sorry if that sounded a little infomercial-ish, but this wonder machine is going to have a permanent spot on my cutting table, literally —because it's so cute and compact (and yes, it slices and dices...fabric).
This thing will cut fabric into many shapes depending on which die you use, so i was asked to pick three that i would like to try out. Hmm...i decided to pick ones that would stretch my sewing abilities and confront aforementioned fears. First one into the basket: 4" half square triangle. Gulp. But what could be more intimidating than sewing a hexagon?? Into the basket it went. Panic. And what about a tumbler block?? Done. Time to checkout. When everything arrived, it was obvious that i had been possessed by a daredevil sewist.
But Lou was ready. And if he was, i was. We could take this on together.
For fabric, i decided to use a majority of the prints from the TerrainDesigner Select bundle i picked out for the Fat Quarter Shop. Thought it might be fun to play around with — Ooo, and it was! Have you seen it?
The deep iris blues, periwinkles and teals are some of my favorite colors. I don't know why it took me so long to include them in a fabric collection!
So here's the lo-down on using the GO!baby. Pay close attention, it's quick.
First, you cut 5 1/2" strips the width of the fabric. I kept it folded in half and then placed it on the foam die like so:
Then you put the cutting mat on top of the fabric...
...and position the cutting mat/fabric sandwich on the flat surface so the front edge is between the rollers — you may have to turn the handle until the rollers grip the cutting mat. Then simply (and really easily) turn the handle to move the whole thing through:
Did i mention you don't need to plug this in? No cord, no motor, and you don't even need muscles. The first time i did it, i really didn't think there was any way it could have done its cutting thing. But after lifting off the cutting mat...voila! Eight half square triangles. Or are they triangles ready to become half-squares? Either way, they were cut to perfection and ready to sew:
I found that on some passes, you might need to snip single threads that did not get cut through completely — mostly in the 90 degree corners. A small thing to contend with when you think of how long it would take to cut everything out by hand. Otherwise, i love that the bias edge is squared off which makes sewing that 1/4" seam allowance really easy. Not to mention there are no dog ears to snip off when it's pressed open. And ok, it was also really fun and yes, i got carried away. In no time, my work table was covered with piles of triangles. I need to write that again so it sinks in. TRIANGLES!
Now what to make. I guess it's a better idea to know what you're going to make ahead of time, but i did not. Instead, i really wanted to play around with these triangles and see what was possible. It's one thing to design a quilt with the help of a computer, but quite another to handle the fabric and watch things unfold by moving the shapes and colors around. I had never really done this (sad, i know), and especially not with triangles.
So first i started off with keeping the colors and prints together, turn turn turn..and poof! A zig zag. This seems to be quite the trend right now...in quilting, apparel, home décor, you name it. The zig zag is having its time in the spotlight (what's old is new and will be old again). Now if Lou would've moved, i could have kept going...
Next one, i still kept the prints/colors together, but turned the triangles and alternated lights and darks in diagonal rows. I put all the darks on top and lights on the bottom and came up with this:
Then after mixing everything up and turning the triangles to my heart's content, something familiar started to come into view. I moved things around a little more and AHA! This traditional quilt block came together with the same excitement as finding two puzzle pieces that fit perfectly and with the surprise/disbelief in knowing they were right under my nose the whole time. It made me think, "So that's how this block is made". I'd seen it so many times, but never known how to actually make it. Franny liked it so much she curled up and took a nap:
Does anyone know what this block is called?
I know i'm not inventing anything new here, but as a beginner quilter, i enjoy discovering the traditional aspects of this craft. It helps me look with modern eyes (through modern technologies) into the past wherein the foundation lies. I like to think that we are all laying bricks (or blocks) of our own atop this historic art form with the awareness that there is much to be learned, celebrated, discovered, reinterpreted...and sewn! So let's get on to that part...
Enter Franny and Lou.
With little to no help from them (as you can see), i sewed five blocks together using that block design.
Some were better than others. I really need to make a design wall (of some sort) because once i stepped back from these...eh hem...completed blocks, i realized that the block "works" better if you position the dark print on the bottom part of the pinwheel. It adds a beveled dimensional appearance to the design. I'm sure someone waaaaay back in the 1800's had already figured this out, but when you learn it the hard way, it sticks. Lou didn't agree. He liked it just the way it was (anywhere it was).
I combined that block with this one because i wanted to contrast the busy-ness with something simpler. The measurements shown are the cutting dimensions for each piece:
AccuQuilt also makes a strip die that would be perfect for a block like this.
I used Moda bella bleached white (9900 97) in the block above as well as for the 2 1/2"sashing. The border is 3 1/2" wide (measurements noted include seam allowances). The lap-sized quilt finishes around 58" x 58" (if my math is correct. That's a big IF). When it's all sewn together it looks like this:
Past meets present, traditional meets modern, i meet half square triangles...and you know what? They're not so scary after all. But now i'm having tumbling hexagonal nightmares. Fortunately, there are techie sewing pioneers of our time who have made some extremely helpful YouTube tutorial videos. I have watched this one over and over and am working up the courage to try it out.
It also occurred to me that the 4" finished half square triangle die would be perfect for the Stepping Stones quilt i designed as a project sheet for Terrain! You can download it free from Fat Quarter Shop, or purchase it if you prefer the printed version. This quilt was on display in the Moda booth last Quilt Market. It was pieced by Sherri and quilted by Judi. Two amazing people who i am very lucky to know.
Thank you AccuQuilt for making such an amazing cutting machine! Oh hey, if you want to sign up for their e-mailing list (and get 22 free patterns) there's a button to click on the right sidebar just for you!
In the July newletter, i let subscribers in on a little secret about a new collaboration and told everyone to keep their eyes peeled for new products this August at...
Yippee!! I'm so excited to be working with my fabulous partners at International Greetings to bring some colorful stationery and organization items to Michaels craft stores.
But guess what? I found out from one of my wonderful newsletter readers that they were already in her local store about two weeks ago! Maybe they're in your store too? If so, and if you want to roll your sleeves up and dig through the giant overflowing baskets of fun, you may come up with some of these goodies:
Notecards, magnetic notepads, pocket notepads, file folders, list pads, chunky pens, luggage tags and even emory boards! Great for back-to-school, party favors, or just to toss in your bag, keep by the phone, stick to the fridge...whatever!
And if there are any Fandango fabric lovers reading this..Michaels is also carrying these supercute desk items in the home office aisle:
Know what else shipped early? Precuts for Terrain! Exciting!
I found out from someone on Twitter. The bright side of not knowing when things are going to happen (exactly) is that it's a surprise for me too (and i love surprises)! So thank you for keeping me in the loop :)
Dont' forget to visit Gudrun, our hostess-with-the-mostest. She's blogging every day along with us. If you've missed the other posts so far, here is the line up:
I was so happy and excited when Gudrun asked me to be a part of this because it's always so fun to see what she's got cooking (pun intended in this case). Just before Market, Gudrun was kind enough to send me a copy of her book to take a peek. I started to flip through it and by the time i reached the back cover, i was so hungry! You see she did quite a tantalizing and subliminally sneaky thing; she combined recipes with sewing projects. Beware!
Gudrun grew up in a small town in Iceland and her book focuses around the dining table where her family would gather to nourish their spirits with lively conversation, laughter and special family treats. Add fabric to the food and fun, and voilà...Table Talk. There are numerous projects for table runners and toppers that span all seasons and the instructions are really simple with well-drawn diagrams accompanying each step. I love diagrams!
One of my favorite projects in the book is the "Jolly Woods" runner.
I've been looking for a small something to make using my fabric collection Flurry and i think this would be perfect! Even though there are lots of triangles (which usually scare me), it's whimsical and too cute not to at least try. Like the buffalo chicken dip! Not that the dip is cute, but i do want to try it.
I almost thought about making the "City Square" topper using Terrain, but then i got to the last few critical assembly steps in the instructions and realized there is NO POSSIBLE WAY i could ever finish this project when the facing page has a recipe for "Hot Fudge Pudding Cake". Nope, no way.
So the project Gudrun made with my fabric is called "Jelly Jar" and it's a sweet and scrappy table runner that uses leftover strips from any jelly roll project — or really almost any project that leaves you with a bunch of 2 1/2" strips. I love projects like this that help to put those scraps to good use. I also love that she used Verna.
Aww, remember her?
The jelly jar theme reminded me of a few things:
1. My grandfather Jack who made homemade jelly and jam from blueberries, blackberries, strawberries and raspberries that he grew himself. I remember going out to his garden and getting tangled in the miles of netting he would use to protect the precious berries from sneaky birds. Also, he would put jelly on...well, everything. I was fascinated by this as a child. A dollop would go on his oatmeal in the morning, or in his cereal, or smeared across toast, or on his ice cream or in some yogurt. Pete and i grow blueberries and raspberries in our back yard and i now know what Jack went through to get even a very small jar. We savor the berries too, as much and as often as possible.
2. I love peanut butter and jelly sandwiches. Always have. And as if it couldn't have gotten better, you can now buy peanut butter with toasted flax seeds added — sublime.
3. Jars are really useful! Last summer, my Dad gave me a simple recipe for making basil-infused olive oil from the basil plants that were left in our garden at the end of the season. It was a wonderful way to use up the plants, and we froze some of the oil to use throughout the winter. Can you believe we just defrosted the last jar this week? Perfect timing because we also just planted this summer's seeds that will eventually yield a fresh supply of liquid gold..
***I'm afraid that just to be on the safe side, i've removed the recipe for the basil oil. Sorry! I don't want to be responsible for inadvertently poisoning anyone with botulism! Yikes! So if you've already copied the recipe down, please do read up on how to make and store
herb-infused oils.***
Ok, i think i've Table Talked enough for now! The book is great and will keep you busy in the kitchen and at the sewing table. Plus, someone is going to be very lucky because Gudrun has generously offered to let me give away one of her beautiful books! All you have to do is leave a comment on this post. Nothing specific, just a comment. I'll draw a winner on Tuesday, May 31st. You can also buy the book here and here if you can't wait :) Good luck!
The fun and zany people at Moda sent me this giant, 48 pound box crammed to the tippy top with totally usable 2" - 5" fabric strips and scraps from my newest line, Terrain. Lookie!
So i was wondering if mayyybe any of you were sorta interested in possibly kinda helping to take some of it off my hands? If so, please include that in your comment. I'll pick a couple winners for some of this as well — good luck times two!